Related Resources
- Personal Website Tutorial with Next.js 13, Sanity.io, TailwindCSS, and TypeScript
- Learn GROQ in 45 minutes
- How Queries Work - GROQ
- Query Cheat Sheet - GROQ
Pre-Workshop
Sanity Plugins
One of the best parts about Sanity is the ability to add plugins to your project. Plugins are packages that add functionality to your Sanity project. There are a lot of plugins available, such as:
- Google Maps integration
- Scheduled Publishing
- Code Input
- Color Input
We’ll be downloading two plugins for our project. If you want to see the full list of plugins, you can check out Plugins and tools for Sanity.
Media Browser Plugin
In the last workshop, we uploaded an image for our blog post. But where did it go? Sanity has a pretty basic media browser that’s extremely limited. However, with the Media Browser plugin, we’ll be able to browse, manage, and select all of our assets in one place.
Run the following command in your project to install the plugin:
npm i sanity-plugin-media
Then, go into sanity.config.js, and add it to the end of the plugins array:
import { media } from "sanity-plugin-media";

export default defineConfig({
  // ...
  plugins: [media()],
});
Learn more about this plugin here.
GROQ Query Language
In the last workshop, we opened up the Vision tab and pasted this query:
*[_type == "photo"]
This query is written in a language called GROQ. GROQ is a query language that is used to query data from Sanity. GROQ stands for Graph-Relational Object Queries. With GROQ, we can describe exactly what data we need, and we can get it in a single request. We can combine documents, exclude documents, get specific fields, create aliases, and more.
Let’s break the following query:
*[_type == 'movie' && releaseYear >= 1979]
A query typically starts with *. This asterisk represents every document in your dataset. To do any useful work this is typically followed by a filter in brackets. The filter above has two terms:
The filter
First, we filter by document type. Every document in Sanity is required to have a type, and the type is always in the _type field. (We prefix any Sanity-specific fields with an underscore in an attempt to avoid clashing with any of your field names.) So _type == 'movie' limits this query to documents of the type ‘movie’. && is the operator “and”.
The second term releaseYear >= 1979 assumes that the movies have a field called releaseYear that contains numbers. It will match any document where this number is larger than or equal to 1979.
Projections
So if we run this query, the result will be an array containing all movies from the year 1979 onwards in the dataset. Nice! However in a typical application movies might be huge documents containing information on actors, staff, posters, tag-lines, show-times, ratings, and whatnot. If our goal is to render a list of movies in an overview, we are wasting bandwidth. Projections to the rescue.
The typical projection is wrapped in braces and describes the data we want to see for each movie. A nice and simple projection for this query would give us the id, title, and release year for each movie. It could look like this: {_id, title, releaseYear}. Putting it all together:
*[_type == 'movie' && releaseYear >= 1979]{ _id, title, releaseYear }
Basic Sorting
Now there is another problem. Our movies appear in some unspecified order. Let’s say we want to sort our movies by year. For this, we use the order-function. Order takes a number of fields and sort directions and orders your documents accordingly. We wanted to sort our movies by releaseYear. This is easily accomplished with order(releaseYear), like this:
*[_type == 'movie' && releaseYear >= 1979] | order(releaseYear) {
  _id, title, releaseYear
}
| (We need the | operator here in front of the order()-function, we’ll discuss that more later.) |
We think of GROQ statements as describing a data flow from left to right. First everything (*) flows through the filter [_type == ‘movie’ && …], then all those movies flow through the order()-function which is then all mapped through the projection {_id, title, …} which picks out the bits we want to be returned.
The order function accepts a list of fields, and optionally you can specify the sort direction for each field. If you wanted to sort the movies by year, and then within each year we want them alphabetical by title, we could use this ordering: order(releaseYear, title) And if we wanted the newest movies first, we could reverse the direction like this: order(releaseYear desc, title).
There’s so much power we can get from GROQ. We can do things like:
- Slice arrays
- Combine documents
- Create references and join data
- Naked Projections
If you want to learn more, check out the GROQ Cheat Sheet, which has examples for all kinds of queries you’ll need.
If you want to learn everything GROQ, check out Learn GROQ in 45 minutes, an interactive learning website from a former Sanity developer.
Taken from How Queries Work - GROQ
Object Schemas
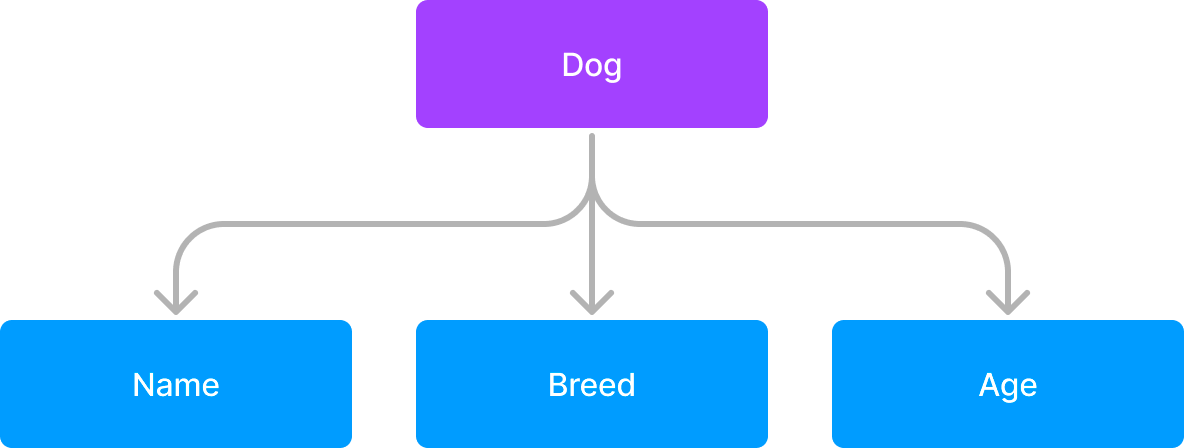
In the last workshop, we made a ton of document schemas. We mentioned Object schemas, but we didn’t go into detail about them. Object schemas are a way to group fields together. Let’s go back to our Dog schema:
What if I wanted to make more document schemas for other pets, but wanted to reuse the fields from the Dog schema? I could copy and paste the fields, but that’s not very efficient. Instead, I can make an Object schema, maybe for Pet Info:
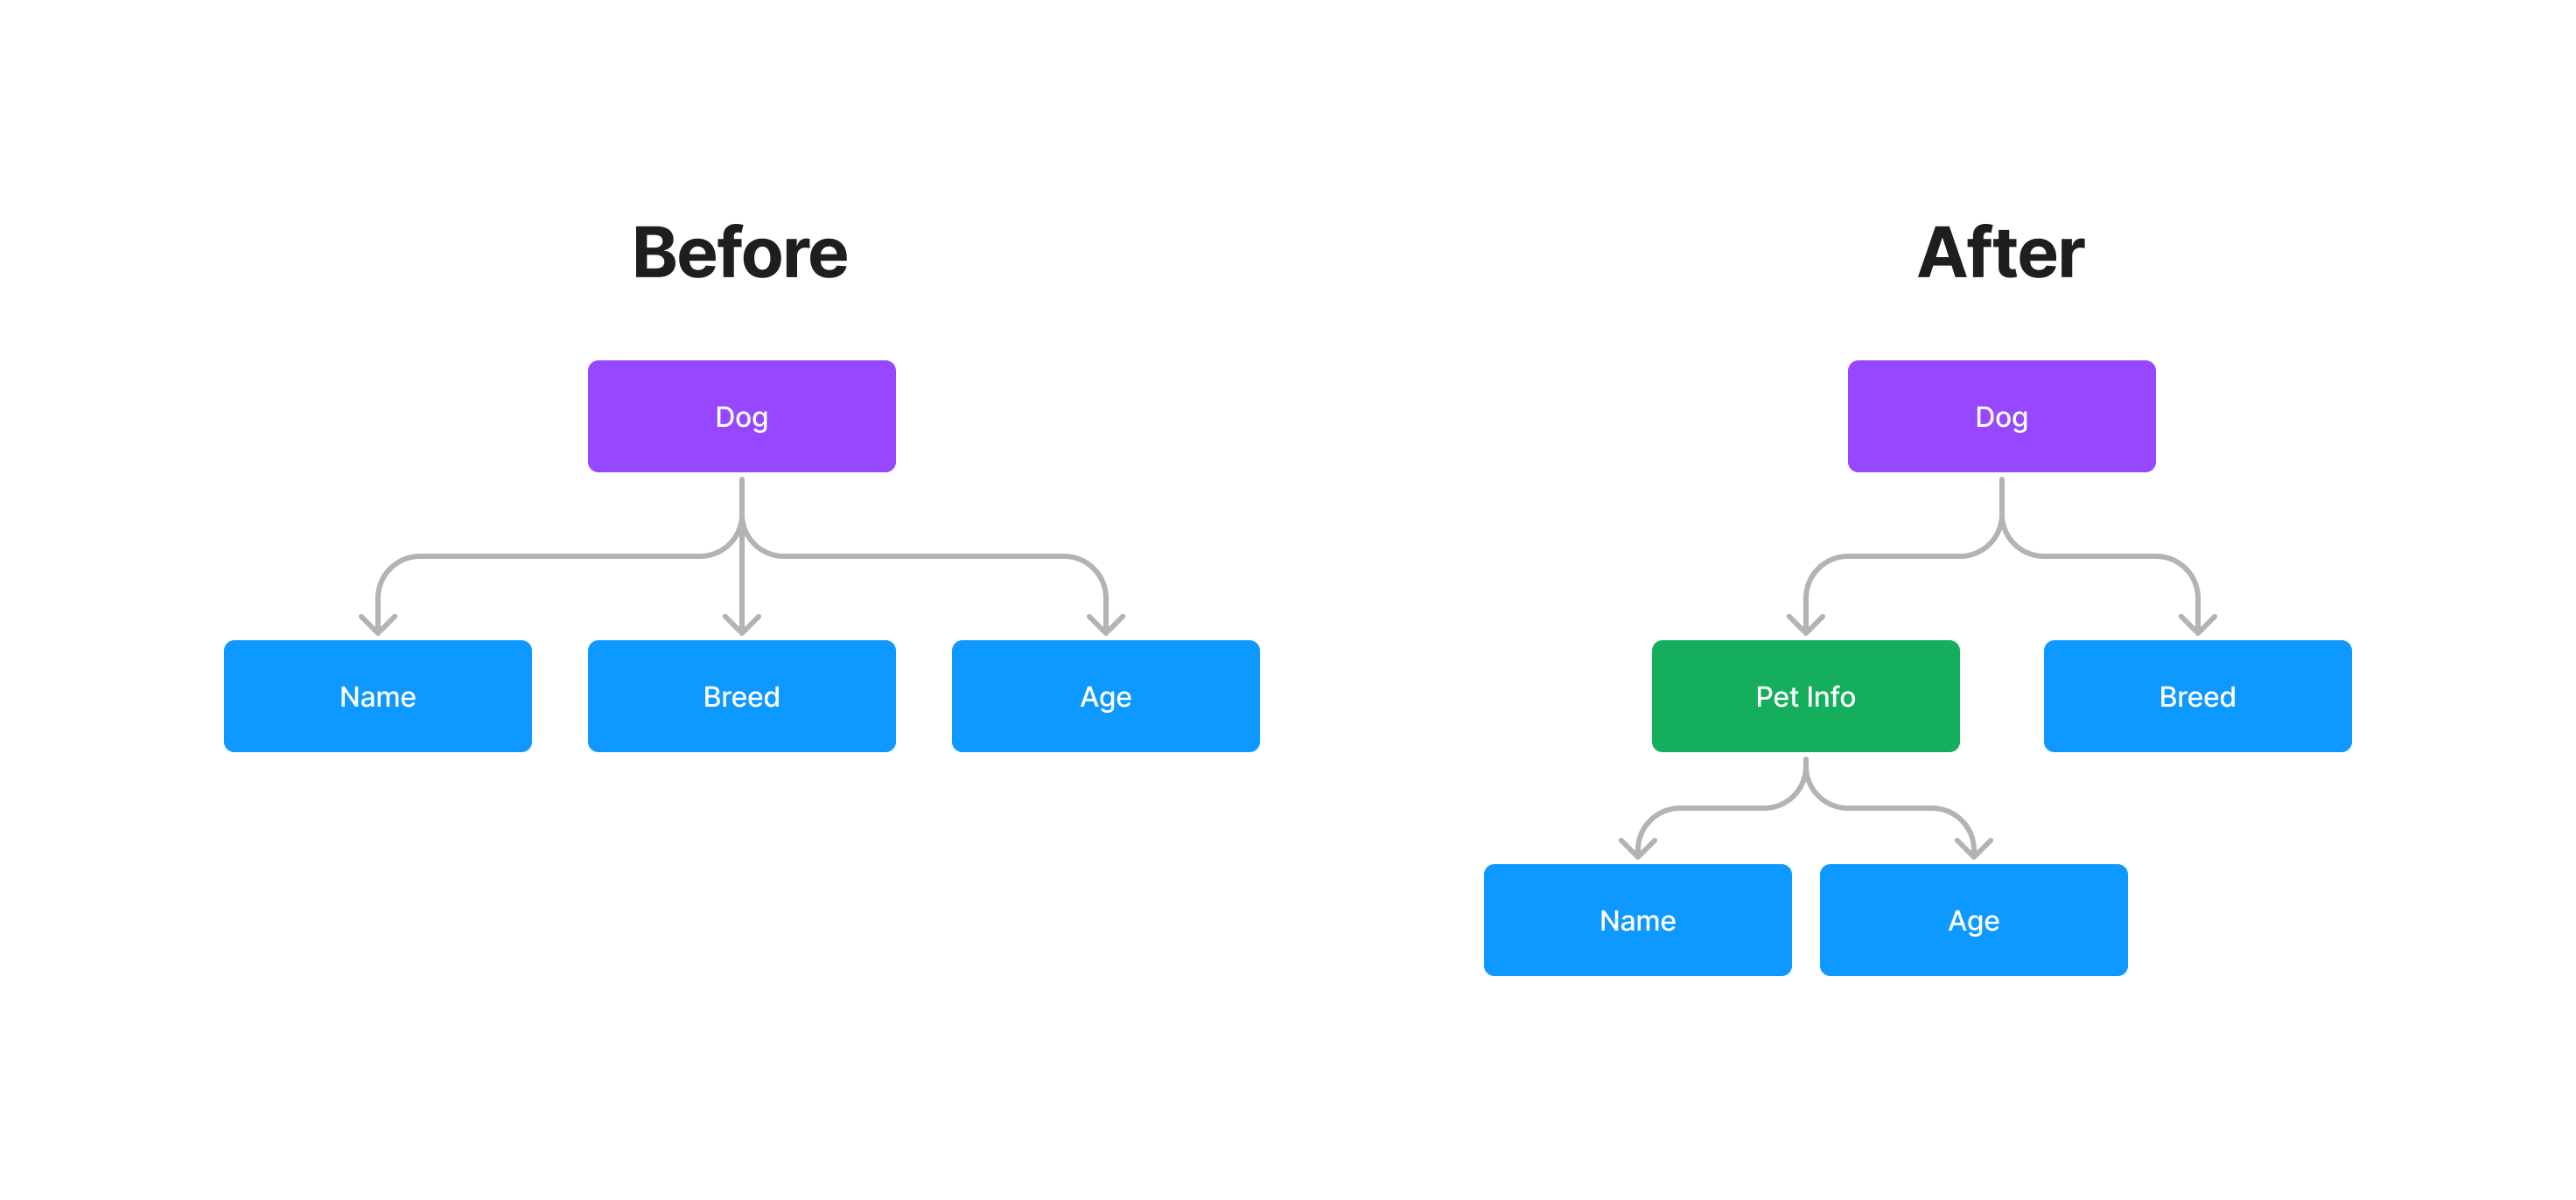
We can now use the Pet Info Object schema in any other schema (including other Object schemas!)
For the sake of our project, we don’t really need to use Object schemas. But it’s good to know that they exist, and that they can be useful in some situations. Here’s the code for the example above:
export default {
  name: "petInfo",
  title: "Pet Info",
  type: "object",
  fields: [
    {
      name: "name",
      title: "Name",
      type: "string",
    },
    {
      name: "age",
      title: "Age",
      type: "number",
    },
  ],
};
export default {
  name: "dog",
  title: "Dog",
  type: "document",
  fields: [
    {
      name: "petInfo",
      title: "Pet Info",
      type: "petInfo",
    },
    {
      name: "breed",
      title: "Breed",
      type: "string",
    },
  ],
};
We can just reuse the Pet Info Object schema anywhere! We can even use it in other Object schemas:
export default {
  name: "dragon",
  title: "Dragon",
  type: "document",
  fields: [
    {
      name: "petInfo",
      title: "Pet Info",
      type: "petInfo",
    },
    {
      name: "gold",
      title: "Gold",
      type: "number",
    },
  ],
};
Querying Data from Sanity in Next.js
Let’s go back to our Next.js project. We’re going to be using the Sanity Client to query data from Sanity. The Sanity Client is a JavaScript library that allows us to query data from Sanity. We can use it in our Next.js project to get data from Sanity, and then display it on our website.
We’ve already installed the Sanity Client in our project, so we can just jump straight into using it.
You’ve learned a bit of GROQ, so let’s use it to query data from Sanity. On our blog page, let’s write a query to get all of our blog posts, being selective towards the fields we want to get. For example, we don’t really need the contents of the blog post, we just need the title, description, date, slug, and image.
*[_type == "blogPost"] | order(date desc) {
  title,
  description,
  date,
  "slug":slug.current,
  image
}
Remember one of the best parts about GROQ is that we can be selective about the fields we want to get. We don’t need to get all of the fields, we can just get the ones we need.
This query will get all of our blog posts, and then order them by date, with the newest blog post first. Let’s use this query in our Next.js project.
Using the Sanity Client
First, let’s import the Sanity Client at the top of app/blog/page.js:
import { client } from "@/sanity/lib/client";
The client allows us to query data from Sanity. If you open up sanity/lib/client.js, you’ll see that the client has already been configured for us. We just need to import it and use it. But how do we get our data from Sanity?
Remember back in the Data and Networking Workshop, we created async functions to get data from an API. We’re going to do the same thing here, but instead of getting data from our API, we’re going to get data from Sanity.
Create the following function:
async function getBlogPosts() {
  const query = `*[_type == "blogPost"] | order(date desc) {
    title,
    description,
    date,
    "slug":slug.current,
    image
  }`;

  const posts = await client.fetch(query);
  return posts;
}
Looks familiar, right? We’re using the Sanity Client to fetch data from Sanity. We’re using the query we wrote earlier to get all of our blog posts, and then we’re returning them.
Before we display our data, we’ll need a component to display our blog posts. Create the following components in their respective files:
import { urlForImage } from "@/sanity/lib/image";
import { format } from "date-fns";
import Image from "next/image";
import Link from "next/link";
import DatePill from "./DatePill";

export default function BlogPostCard({ post }) {
  return (
    <Link
      href={`/blog/${post.slug}`}
      className="space-y-4 md:hover:opacity-75 transition-opacity"
    >
      <Image
        src={urlForImage(post.image).auto("format").size(1920, 1080).url()}
        width={1920}
        height={1080}
        alt={post.title}
        className="rounded-2xl border border-primary-400"
      />
      <div className="space-y-2">
        <DatePill date={post.date} />
        <div>
          <h2 className="text-lg font-semibold">{post.title}</h2>
          <p className="line-clamp-1 text-sm text-primary-600">
            {post.description}
          </p>
        </div>
      </div>
    </Link>
  );
}
There’s a few things new things going on here:
- We’re wrapping it in a Next
Linkcomponent, so that we can click on it and go to the blog post page - but why is it a link to/blog/${post.slug}? What does that even mean? (You’ll find out soon.) - We’re using this thing called
urlForImageto get the URL for the image. This is a method from the Sanity Client that allows us to utilize Sanity’s Image Pipeline. It manages resolution, size, and other types of transformations for us. Learn more about it here. In this component, we’re setting the image to be 1920x1080, and we’re using theautomethod to automatically choose the best format for the image.
date-fns
We also need to create this component which takes a date and formats it:
import { format } from "date-fns";

export default function DatePill({ date }) {
  return (
    <p className="text-xs font-medium px-2 py-1 rounded-full bg-secondary-200 text-secondary-600 inline">
      {format(new Date(date), "MMMM dd, yyyy")}
    </p>
  );
}
It won’t take long for you to realize that this won’t work. We haven’t installed date-fns yet. Let’s do that now:
npm i date-fns
With that installed, we can now use it to format our date. We’re using the format method to format our date. We’re passing in a new Date object, and then we’re passing in a format string. The format string tells date-fns how to format the date. In this case, we’re formatting it to be MMMM dd, yyyy, which will give us a date like November 14, 2023.
Using our blog post component
Now that we’ve made our blog post and date components, let’s use them in our blog page:
...
import BlogPostCard from "@/app/blog/components/BlogPost";

export default async function Blog() {
  const posts = await getBlogPosts();

  return (
    <Container>
      <div className="grid grid-cols-1 md:grid-cols-3 gap-4">
        {posts.map((post) => (
          <BlogPostCard key={post.slug} post={post} />
        ))}
      </div>
    </Container>
  );
}
...
Remember that we have
getBlogPostsand also the import for the Sanity Client at the top of the file.
You should be pretty familiar with this code. We’re using our getBlogPosts function to get all of our blog posts, and then we’re mapping over them and displaying them using our BlogPostCard component.
If you go to the blog page, you’ll hopefully see all of your blog posts!
Adapting for Photos (DIY)
The same ideas apply to the Photos page, as well as the Home page. Try and figure out what queries you’ll need to use! Here’s some helpful components:
import { urlForImage } from "@/sanity/lib/image";
import Image from "next/image";

export default function Photo({ photo: { title, image, favorite } }) {
  return (
    <div className="space-y-2 group">
      <Image
        src={urlForImage(image).auto("format").size(1920, 1080).url()}
        width={1920}
        height={1080}
        alt={title}
        className="rounded-2xl border border-primary-400 md:group-hover:scale-95 transition-transform transform"
      />
      <h2 className="font-medium flex items-center justify-center">
        {favorite ? <p className="text-sm mr-2">⭐️</p> : null}
        {title}
      </h2>
    </div>
  );
}
The only unique thing here is that we’re deconstructing the photo object in the function parameters. This is just a shortcut to get the title, image, and favorite fields from the photo object. We’re also using the urlForImage method to get the URL for the image.
Making a Blog Post Page
Remember the slug field we added to our blog post schema? We’re going to use that to make a blog post page. We’re going to use the slug to get the blog post from Sanity, and then we’re going to display it on the page.
Up until now, we’ve created a new file/folder for every page we want to make. But we’re going to do something different here. We’re going to create a dynamic route. A dynamic route is a route that can have different values. For example, /blog/first-post and /blog/second-post are both dynamic routes. They both have the same base path, but they have different values. We’re going to use a dynamic route to create a blog post page.
Creating Dynamic Routes
The way we create dynamic routes is extremely similar to just creatng a normal page. We want a structure like /blog/first-post and /blog/second-post, so inside of the app/blog folder, create a [post] folder, with a page.js file inside. The brackets around post tell Next.js that this is a dynamic route. We can now access the value of post in that page.
Let’s start adding some code to our page:
export default async function BlogPost({ params }) {
  return <Container>{/* Content */}</Container>;
}
Notice the parameter params in the function. This is where we can access the value of post. We can access it with params.post. We’re going to use this to get the blog post from Sanity. There’s a few things we need to do to finish this page:
- We’ll need to get the blog post from Sanity
- We’ll need to display the blog post
- Show a header with the title and date
- Display the post contents
Getting post data from Sanity
Let’s create a query for the blog post. We want to get the blog post with the slug that matches the slug in the URL. We can do that with the following query:
*[_type == "blogPost" && slug.current == $slug] {
  title,
  description,
  date,
  "slug":slug.current,
  image,
  content
}
We’re using the $slug variable to get the slug from the URL. We’re also getting the content field, which is a Portable Text field. Now, let’s create our getBlogPost function:
import { client } from "@/sanity/lib/client";

async function getBlogPosts(slug) {
  const query = `*[_type == "blogPost" && slug.current == $slug] {
    title,
    description,
    date,
    "slug":slug.current,
    image,
    content
  }`;

  const posts = await client.fetch(query, { slug });
  return posts;
}
We’re using the $slug variable in our query, and we’re passing in the slug variable as a parameter to our function. We’re also passing in the slug variable as a parameter to the fetch method. This is how we pass variables to our query. Since they’re the same name, we can just pass in the slug variable as a parameter to our function. Otherwise, we’d have to do something like this:
const posts = await client.fetch(query, { slug: thisIsaSlugVariable });
Here’s a component to display the header of our blog post:
import DatePill from "../../components/DatePill";

export default function BlogPostHeader({ post }) {
  return (
    <header className="text-center space-y-4">
      <DatePill date={post.date} />
      <h1 className="font-semibold text-4xl">{post.title}</h1>
      <p className="font-medium text-primary-700 text-lg">{post.description}</p>
    </header>
  );
}
We can now use this in our page:
...
import BlogPostHeader from "./components/BlogPostHeader";

export default async function Page({ params }) {
  const post = await getBlogPost(params.post);

  return (
    <Container>
      <div className="mx-auto max-w-5xl space-y-8 py-8">
        <BlogPostHeader post={post} />
      </div>
    </Container>
  );
}
...
Now, if you click on any of your blog posts, you should see the header of the blog post on their own, unique, dynamic page!
Portable Text
The next step is getting our blog post content to display. We’re going to use a library called @portabletext/react to convert our Portable Text to React components:
npm i @portabletext/react
This allows us to use a component called PortableText to display our Portable Text. We can immediately use it in our page:
...
import { PortableText } from "@portabletext/react";

export default async function Page({ params }) {
  const post = await getBlogPost(params.post);

  return (
    <Container>
      <div className="mx-auto max-w-5xl space-y-8 py-8">
        <BlogPostHeader post={post} />
        <hr className="border-primary-200" />
        <article>
          <PortableText value={post.content} components={[]} />
        </article>
      </div>
    </Container>
  );
}
...
If you go to the blog post page, you’ll see that it’s not styled at all. That’s something we can easily fix with a plugin for Tailwind CSS.
Tailwind Typography
Tailwind CSS has a bunch of plugins that add additional functionality to Tailwind CSS. One of those plugins is Tailwind Typography. The Typography plugin provides a set of prose classes we can use to add great typographic defaults to any vanilla HTML you don’t control (like HTML rendered from Markdown, or pulled from a CMS).
We can install it with the following command:
npm install -D @tailwindcss/typography
Notice the
-Dflag. This is short for--save-dev. This means that we’re installing it as a development dependency. We don’t need it in production, so we don’t need to install it as a dependency. More on this later!
Now that it’s installed, we can add it to our tailwind.config.js file:
module.exports = {
  theme: {
    ...
  },
  plugins: [
    require('@tailwindcss/typography'),
    ...
  ],
}
Now, let’s go back to our blog post page and update the page with our new prose classes:
...
export default async function Page({ params }) {
  const post = await getBlogPost(params.post);

  return (
    <Container>
      <div className="mx-auto max-w-prose space-y-8 py-8">
        <BlogPostHeader post={post} />
        <hr className="border-primary-200" />
        <article className="prose md:prose-md prose-primary mx-auto">
          <PortableText value={post.content} components={portableTextComponents} />
        </article>
      </div>
    </Container>
  );
}
...
Now, if you go to the blog post page, you should see that it’s styled with the Tailwind Typography plugin! But there’s one final problem you might have noticed…
Custom Portable Text Components
Remember back to how we defined our Portable Text schema? We defined it like this:
{
  name: "content",
  title: "Content",
  type: "array",
  of: [
    { type: "block" },
    {
      type: "image",
    },
  ],
},
We defined it as an array of blocks and images. The Portable Text component doesn’t know how to handle images, by default. We can fix this by creating a custom component for images:
import { urlForImage } from "@/sanity/lib/image";
import { tryGetImageDimensions } from "@sanity/asset-utils";
...
const portableTextComponents = {
  types: {
    image: ImageComponent,
  },
};

function ImageComponent({ value }) {
  const { width, height } = tryGetImageDimensions(value);

  return (
    <Image
      src={urlForImage(value).fit("max").auto("format").url()}
      width={width}
      height={height}
      loading="lazy"
      className="mx-auto md:max-w-prose rounded-lg"
      style={{ aspectRatio: width / height }}
    />
  );
}
And then updating the Portable Text component to use our custom components:
<PortableText value={post.body} components={portableTextComponents} />
Now, if you go to the blog post page, you should see that the images are displaying correctly!
Why this is important
When we talked about Block Content & Portable Text, we mentioned that it’s a way to store rich text. But it’s more than that. As seen, we can have it store images, and we can even create custom components to display those images. But the options are limitless. You could have:
- Video Player
- Code Editors
- Quizzes
- Music Players
- Games
and more, just with expanding your Portable Text schema and creating custom components. This is why Portable Text is so powerful. If you can think it and make it, you can store it in Portable Text. Since it’s so flexible, you can design software that can interpret it in any way you want.
Practice
The Project Showcase is in two weeks from now, with next week being a design and interaction oriented workshop. This means that you have two weeks to work on your project. Here’s some ideas for what you can do:
- Add more pages
- Add more components
- Add more styles
- Add more content with Sanity
- Customize your CMS
We want to see you make your website your own. Feel free to go crazy with it. If you want to add a feature, but you don’t know how, ask us! We’re here to help you.